
OEM Sanding Sheet Guide: Choosing the Right Custom Abrasive for a Smooth Finish
2026-11-02
If you’re tired of sanding sheets that clog, tear, or leave inconsistent scratches, it’s time to stop settling for stock abrasives. OEM custom sanding sheets let you tailor grit, backing, and bond to your exact material and finish goals. Here’s how to choose the right one for a flawless result—and why SHENZHEN SUN ABRASIVES should be on your shortlist for reliable custom production.
What a Custom Abrasive Actually Changes in Your Sanding Workflow
Most people assume a custom abrasive just lasts longer or cuts faster. But the real shift happens in how your hands read the surface. A standard grit might leave a uniform scratch pattern that your next coat of finish exaggerates. A custom blend, tuned to your specific substrate and pressure, breaks down differently. It sheds dull grains at a controlled rate, so the scratch depth stays consistent from start to finish. That means less time feeling for rogue grooves with your fingertips, and fewer surprises when the stain hits the wood.
The workflow itself gets quieter. Not in decibels—though a well-matched abrasive does reduce chatter—but in the number of times you stop to swap discs or question whether you've gone too far. When the abrasive is dialed to the exact hardness of your material, you stop chasing the surface. One pass with a custom ceramic blend can replace the usual progression of three or four factory grits. You move from shaping to smoothing without the usual detour into repair work, because the abrasive is removing material in a way that complements the wood's grain rather than fighting it.
There's also the matter of what doesn't change. Your hand speed, your tool of choice, your eye for a flat plane—those stay yours. What changes is the feedback loop. A custom abrasive doesn't compensate for bad technique; it reveals where your technique was already working. You'll find yourself sanding less by habit and more by observation, because the abrasive gives you honest, predictable results. That's the part nobody puts on the spec sheet: the confidence to trust the process from rough to ready.
Reading Grit Numbers Like a Finisher, Not a Parts Catalog
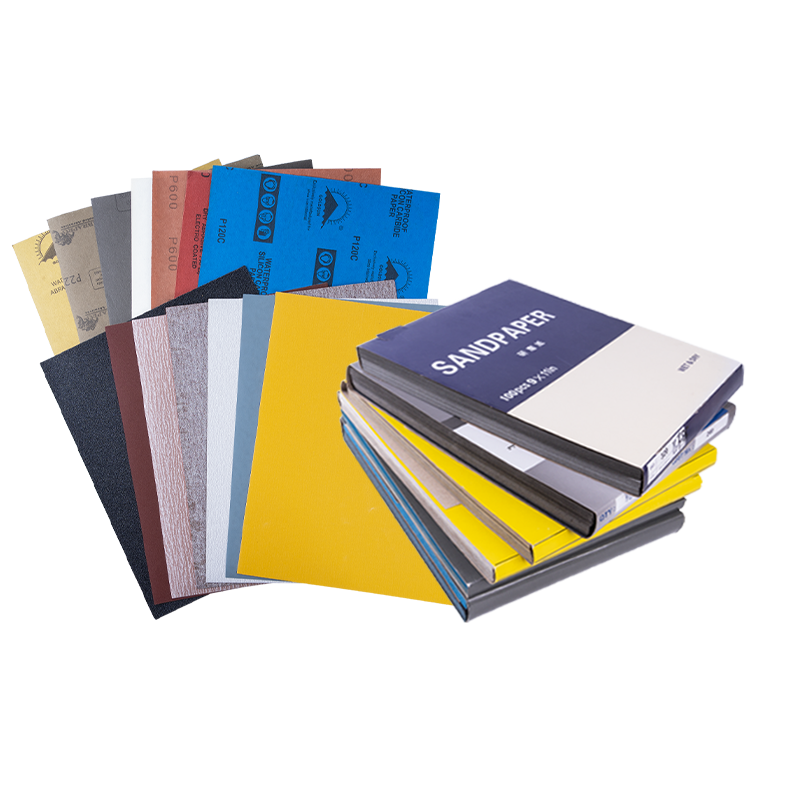
A parts catalog tells you that 80 grit is coarser than 120 grit and leaves it at that. A finisher reads the same numbers as a language for shaping a surface without fighting it. The jump from 60 to 80 removes stock, sure, but the real question is whether the scratch pattern left behind will telegraph through the next two steps or disappear quietly.
Numbers on paper rarely match the abrasive's behavior once it's loaded with dust, worn at the edges, or pressed into a soft backing pad. Finishers tend to treat grit as a moving target: the same 220 can cut like worn 320 on a foam interface or dig like fresh 180 on a hard block. Reading grit like a finisher means checking the result on the material, not the label on the box.
Progression matters less as a fixed ladder and more as a conversation between the previous scratch depth and the next abrasive's bite. Sometimes skipping a grit saves time; sometimes repeating one with a lighter touch does more than stepping finer. The number is only the start of the sentence, not the whole instruction.
Backing Weight and Flex: The Overlooked Variables Behind Swirl Marks
Most people blame swirl marks on abrasive choice or machine speed, but the backing material quietly decides whether those curved scratches appear at all. A heavier backing tends to dampen vibration and keep the abrasive face flatter against the panel, which sounds helpful until the pad starts flexing under load. That subtle flex shifts pressure toward the outer rim, and the resulting uneven cut leaves the telltale curved trails that finer polish alone cannot remove.
Flex works in the opposite direction. A very pliable backing follows body contours easily, but it also lets the abrasive bunch or ripple under pressure. When that happens, individual grains bite at slightly different depths, so the scratch pattern drifts from uniform to erratic. The weight of the backing changes how much of that flex actually translates to the surface, not just what you feel in your hand. A pad that feels soft may still create hard, random marks if the backing is too light to control the face.
The real overlooked variable is the interaction between the two. A mid-weight backing with controlled flex keeps the cutting face stable without losing conformity, and that balance reduces random swirl marks far more than switching to a finer compound. Before you chase a swirl-free finish with another polish, bend the pad and feel the backing. If it folds too easily or feels like a stiff board, the backing is working against you, and no amount of slower passes will fully correct the pattern.
Open Coat vs. Closed Coat: Choosing Based on Dust, Not Just Grit
Abrasive selection often gets stuck on grit size, but the real difference between open coat and closed coat comes down to how much dust your job produces. Open coat has wider gaps between the abrasive grains, so swarf and paint chips fall away instead of clogging the surface. That makes it the better pick for soft woods, aluminum, or old finishes that gum up fast.
Closed coat packs grains tightly together, giving you more cutting edges per square inch. It cuts faster and leaves a smoother scratch pattern on hard, brittle materials like glass, stone, or cured epoxy. But the moment you use it on something that produces fine dust, the paper loads up, and you end up pressing harder just to keep it working.
Try this: if the dust sticks to your fingers or feels greasy, switch to open coat. If the work surface is dense and the debris is dry and powdery, closed coat will reward you with speed. Let the dust tell you what the abrasive needs, rather than forcing a grit number to do the thinking.
Hole Patterns and Edge Profiles That Make Dust Collection Earn Its Keep
Most off-the-shelf dust ports are round, but square or slotted patterns often outperform them when chips are stringy. A cluster of small holes drilled near the cutter head creates a focused low-pressure zone that pulls debris sideways before it can scatter, while a single large hole just vacuums whatever falls directly beneath it. The trick is matching hole diameter to the debris size: too small and shavings bridge across the opening, too large and airspeed drops enough to let heavy particles settle.
Edge profiles matter just as much as hole layout. A sharp lip at the mouth of a dust port creates a vena contracta effect that chokes airflow, so rounding or chamfering that edge can boost capture velocity by a surprising margin. On router tables and shrouds, a 45-degree bevel angled toward the cutter acts like a funnel, guiding chips into the airstream instead of letting them bounce off a flat face. Even a slight radius on the inside corner of a blast gate or hood keeps sawdust from packing into the corner and eventually blocking the line.
When retrofitting an old machine, test both patterns before cutting metal or plastic. A row of angled slots along the back of a shroud can pull fine dust out of the tool's body, while the front edge stays open enough to avoid starving the impeller. Pair that with a gently ramped edge profile, and you get collection that works with the airflow rather than against it.
Sampling Custom Sheets: A Three-Part Test Before Committing to a Bulk Order
Ordering custom sheets in bulk sounds straightforward until you realize the sample you loved might not survive a single wash or fit the bed the way you expected. Instead of gambling on a large order, run every sample through a simple three-part test before signing off. It takes a little extra time, but it’s far cheaper than replacing a pallet of sheets that miss the mark.
Start with the hand and drape check. Rub the fabric between your fingers, bunch it up, and let it fall. Does it feel crisp or soft? Does it breathe, or does it trap heat? Then move to the wash test. Toss the sample into a regular cycle with your usual detergent, dry it on medium, and measure for shrinkage, pilling, and color fading. A sheet that looks great out of the box but shrinks three inches or turns rough after one wash isn’t ready for customers.
Finally, put the washed sample on an actual mattress. Check the corner depth, elastic strength, and whether the flat sheet still drapes evenly. Walk around the bed, tug the corners, and mimic a week of real use. Only when a sample passes all three stages—feel, wash, fit—should you feel comfortable committing to a bulk order.
FAQ
Focus on a consistent grit distribution and a backing that stays flat under pressure. Uneven abrasive coating creates random deep scratches, even if the labeled grit is fine. A stiffer film backing helps keep the sheet from buckling, which translates into more uniform contact with the surface.
Going too coarse leaves visible furrows that take extra steps to remove. Going too fine too early can glaze over the surface and hide scratches until the final coat. The sweet spot is matching the grit to the previous sanding stage so each step removes the marks from the one before without overworking the material.
For mild curves, a flexible cloth or thinner film backing lets the sheet follow the shape without cracking. For tight radii, consider a foam-backed abrasive that compresses just enough to distribute pressure. Rigid paper backings tend to crease and leave flat spots on anything that is not perfectly flat.
If you are fighting the same defect on every job, such as edge burning, premature clogging, or inconsistent scratch patterns, a custom sheet can solve it faster than adjusting your technique. The upfront cost makes sense when the abrasive is tailored to your specific substrate, pressure, and finish requirements.
Ceramic grains stay sharp and self-sharpen under high pressure, making them ideal for hard metals or heavy stock removal. Aluminum oxide is more forgiving on wood and softer composites. Silicon carbide excels on paint, clear coats, and glass because it fractures cleanly and leaves a finer scratch pattern.
Yes, if the grain is tightly sized and the coating is open enough to shed sanding dust. Swirl marks usually come from loose abrasive particles or buildup on the sheet surface. A custom sheet with a clog-resistant coating and precise grain classification will leave a much more predictable finish on clear coats.
A heavier coating of abrasive delivers longer life but can slow the cut because more grain is sharing the load. A lighter coating cuts faster but wears out sooner. The right balance depends on whether your bottleneck is material removal speed or the cost of frequent sheet changes.
Conclusion
Choosing a custom abrasive isn't just about swapping one grit for another; it reshapes how your sanding workflow actually behaves. A truly dialed-in sheet lets you stop fighting the tool and start reading the surface. Grit numbers matter less as a catalog spec and more as a feel: an 800-grit may cut faster on a stiff backing than a worn 600 on a limp one. Backing weight and flex decide whether that fine scratch turns into a swirl or vanishes under the next pass. Too much flex lets the abrasive roll over edges and haze them; too little concentrates heat and loads the coat. Open-coat options keep dust from packing between grains when you're working resin-rich woods or soft paints, while closed coat gives a more uniform scratch pattern on hard clearcoats.
Hole patterns and edge profiles are where custom sheets earn their keep in a busy shop. A multi-hole layout matched to your sander pulls dust away before it can ball up and burn the finish, but only if the edges are cut clean and the pattern aligns with the platen. Before committing to a bulk order, run a three-part sampling test: dry sand a flat panel, wet sand a contoured edge, and check how the sheet behaves after ten minutes of continuous use. If the abrasive still cuts without loading, leaves no pigtails, and the backing stays flat, you've found a sheet worth stocking. That kind of on-the-bench validation beats any spec sheet and separates a true OEM partner from a generic reseller.
Contact Us
Contact Person: Amanda Wang
Email: [email protected]
Tel/WhatsApp: +86-13602569854
Website: https://www.sunabrasives.com.cn