
LED Motorcycle Light Bulb Sourcing: A Practical Guide for Riders
2026-08-16
Upgrading to LED motorcycle bulbs should be simple—until you're staring at a wall of options with conflicting lumen ratings, base types, and heat sink designs. Sourcing the right bulb for your bike isn't just about picking the brightest one; it's about fitment, beam pattern, and longevity on rough roads. In this practical guide, we'll walk through the essentials of LED bulb sourcing so you can avoid costly mistakes. Along the way, you'll see why many riders trust LUXFIGHTER for bulbs that actually perform as promised.
Why Your Stock Halogen Is Leaving You in the Dark
That dim, yellowish beam stretching maybe fifty feet down the road isn't just unimpressive—it's a genuine liability. Stock halogen bulbs operate by heating a thin tungsten filament until it glows, a process that wastes most of its energy as heat rather than light. Over time, the filament degrades, the glass darkens, and the reflector inside your headlight housing loses its focus. Before you know it, you're squinting at potholes and road signs that used to be plainly visible.
What most drivers don't realize is that halogen output drops long before the bulb actually burns out. A bulb with 500 hours on it can lose 20 to 30 percent of its original brightness, yet it still looks like it's working fine. That gradual fade tricks your eyes into accepting a dangerously short sight range. On a moonless stretch of highway, that missing light can erase an entire reaction window—the distance between seeing a hazard and doing something about it.
Upgrading isn't about blinding oncoming traffic or slapping in the cheapest LED you can find. It's about restoring the kind of visibility your headlights were supposed to provide in the first place. When you finally swap out those tired halogens, the difference isn't subtle: white, even light that reaches further and reveals what's been hiding in the margins all along.
Decoding Lumens and Kelvin Without the Marketing Hype
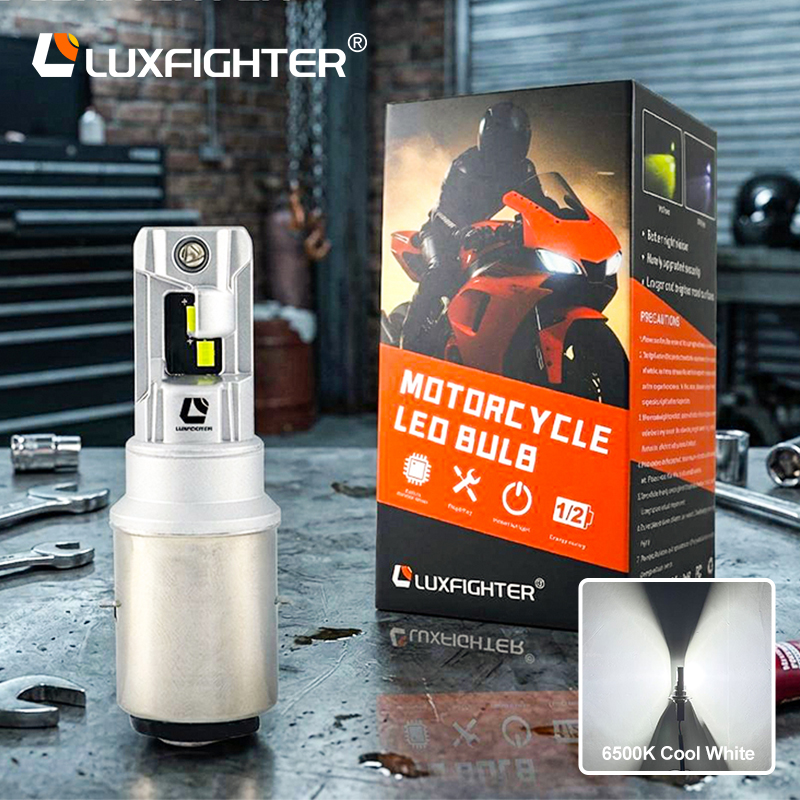
Walk into any lighting aisle and you'll see numbers thrown around like confetti—800 lumens, 2700 Kelvin, 5000K daylight. Most people nod along, then grab whatever bulb has the friendliest box. But if you actually want to see your space clearly and not feel like you're living in a warehouse, you need to cut through the jargon. Lumens tell you how much light you're getting, while Kelvin tells you how warm or cold that light feels. The trick is knowing that more lumens doesn't always mean better, and a higher Kelvin number isn't automatically more "natural."
Think of lumens as the volume of light. A 60-watt incandescent used to be the reference point, but those days are gone—now you'll see 800 lumens doing the same job for a fraction of the energy. But here's what the packaging won't say: lumens measure total output, not where the light goes. A bare 800-lumen bulb in a pendant fixture will feel glaring and harsh, while the same bulb behind a shade might feel dim. Position and fixture design matter as much as the number. And retailers love to push "bright" 1600-lumen bulbs for kitchens, but unless you're doing surgery on the countertop, that can wash out texture and make food look flat.
Kelvin gets even more twisted. 2700K is usually labeled "soft white"—that yellowish glow from old incandescents. 3000K is a step cleaner, closer to halogen. 4000K starts to feel "cool white," and 5000K-plus is often marketed as "daylight." The problem is that daylight changes all day long: morning sun is around 4000K, noon is 5500K, and shade can be 7000K or more. Most indoor spaces look best between 2700K and 3000K because our eyes associate that range with evening calm. Slap a 5000K bulb in a bedroom and you'll feel like you're sleeping in a gas station bathroom. The marketing hype wants you to believe brighter and cooler equals better, but in reality, the right lumens and Kelvin depend entirely on the room, the time of day you use it, and what you're doing there. If the box had to tell the truth, it would say: match the bulb to the task, not the buzzword.
Road-Legal or Ticket Magnet? Navigating Beam Patterns and Regulations
The line between a clean, road-legal setup and a guaranteed pull-over often comes down to how your lights are aimed and shaped. A properly aligned low beam should throw a crisp horizontal cutoff, lighting up the road without spraying into oncoming traffic. When you swap in cheap LED bulbs without adjusting the projector or reflector, that cutoff can blur or disappear entirely, turning a routine night drive into a rolling glare machine. It’s not just about being polite—it’s about avoiding the kind of attention that starts with a flashlight in your mirror and ends with a fix-it ticket.
Different regions enforce different rules, but most draw the line at beam height, color temperature, and whether the housing is actually designed for the bulb type. Europe leans heavily on ECE markings, requiring self-leveling and lens washers above a certain lumen output, while many U.S. states only check that your lights don’t blind oncoming drivers and fall within an acceptable white-to-yellow range. Blue-tinted or purple-tinted bulbs, even if they’re technically “white” on a spec sheet, are a common red flag. Officers aren’t carrying spectrometers—they’re judging by eye, and a beam that looks blue at 2 a.m. is a magnet for a citation.
The simplest way to stay out of trouble is to match the bulb to the housing, then verify the cutoff against a wall from 25 feet. If the line looks fuzzy or kicks up on the left side, you need to either shim the bulb, adjust the vertical aim, or replace the housing altogether. Remember that off-road light bars and pod lights are rarely street-legal when switched on, no matter how well aimed they are—wiring them to a separate switch that’s off on public roads keeps you from learning that lesson the expensive way. At the end of the day, a properly set up beam pattern should let you see the road, not the reflection in someone else’s windshield.
Heat Sinks, Fans, and the Truth About LED Lifespan
A common misunderstanding is that an LED's rated life is a fixed promise, independent of how the fixture is built. In reality, the diode itself rarely fails suddenly; instead, its light output slowly degrades over time. That degradation accelerates sharply with heat. Every 10°C rise in junction temperature can cut the usable life roughly in half. A heat sink is not an optional accessory—it is the only thing standing between the LED junction and a rapid decline. But a heat sink alone just moves heat into the surrounding air. If that air stays still, the sink's temperature climbs, and the LED suffers.
Fans change the equation by forcing air across the fins, lowering the thermal resistance dramatically. This lets a compact fixture handle far more power than a passive design could. However, a fan is a mechanical part with bearings, blades, and a motor. Dust, moisture, and simple wear can stop it long before the LED shows any sign of aging. When the fan dies, the heat sink becomes a trap, and the LED follows quickly. Designers who rely on active cooling must accept that the fan sets the real lifespan, not the LED package itself.
The honest truth is that most advertised LED lifespans—50,000 hours or more—come from laboratory tests of bare diodes under controlled temperatures. They say nothing about the driver capacitors, solder joints, lens yellowing, or fan bearings in a real product. A well-built passive fixture can outlast a poorly built active one, even if the active unit looks more powerful on paper. When comparing lights, pay less attention to the diode spec sheet and more to how the manufacturer handles heat, protects the fan, and rates the complete system under realistic conditions.
Plug-and-Play Promises vs. Real-World Wiring Woes
The marketing gloss on the box makes it sound effortless: just snap the connectors together, flip the switch, and your smart home springs to life. But anyone who has actually crawled under a desk or fished cable through a wall knows the truth. Those color-coded plugs and labeled ports only get you so far before you're wrestling with a tangle of legacy wiring that refuses to match the diagram.
Real-world installations rarely follow the tidy logic of a demo bench. You'll find junction boxes crammed with mismatched wire gauges, grounding screws painted over by a previous owner, and neutral wires that were never pulled to the switch location. The promise of a ten-minute upgrade evaporates the moment you realize the existing three-way circuit doesn't line up with your new smart switch's requirements.
Even after the physical connections are made, the headaches continue. Flickering LEDs, phantom loads that drain batteries, and interference from a nearby motor can turn a simple retrofit into a weekend-long troubleshooting session. The plug-and-play label is a starting point, not a guarantee—adapting generic hardware to an old house's quirks is where the real work begins.
Where to Actually Buy Quality Bulbs Without Getting Burned
Skip the big-box garden centers if you want bulbs that actually come up. Most of those bins have been sitting in a warm, dry retail space for weeks, and the bulbs are often undersized or already starting to shrivel. Instead, go straight to specialty bulb nurseries that dig and ship in late summer or early fall. Places like Brent and Becky’s, John Scheepers, or Old House Gardens consistently send plump, firm bulbs that are true to name. Yes, you’ll pay a bit more per bulb, but you’re buying a live plant, not a lottery ticket.
Local garden clubs and plant swaps are another underrated source. Members often split oversized clumps of daffodils, alliums, or species tulips in early summer and are happy to share for a few bucks or a trade. You get bulbs that are already adapted to your regional climate and soil, which means less fuss about chill hours or drainage quirks. Just make sure to inspect each bulb before taking it home: it should feel heavy for its size, with no soft spots, mold, or papery skin that flakes off like dried onion.
Online marketplaces can work, but only if you buy from growers, not resellers. Look for listings that specify the bulb’s harvest date and circumference in centimeters—a 12+ cm tulip bulb will bloom far better than a 10 cm one. Avoid sellers who use stock photos of flowers rather than the actual bulbs, and never order bulbs that ship in spring. That’s a clear sign they’ve been held in cold storage too long, and you’ll end up with a bag of mush by planting time.
FAQ
Not necessarily. Housings vary a lot between models, and some have shallow dust caps that can't clear a bulky LED base with a cooling fan. Measure the clearance behind the bulb before ordering, and look for compact or fanless designs if space is tight. Also check whether your bike uses a single beam or dual filament bulb, because that changes the connector type.
On some newer bikes, yes. The lower power draw of an LED can trigger a 'bulb out' warning. If your dash relies on resistance checks, pick an LED that explicitly includes a built-in driver or canbus decoder. Not every model needs one, but if you start seeing warning lights after install, that's likely the culprit.
Not always. Raw lumen figures don't tell you how well the beam pattern matches your reflector. A super bright LED in the wrong housing can scatter light and blind oncoming traffic while leaving dark spots in your lane. Pay attention to emitter placement and whether the bulb mimics the filament position of the original halogen.
Stick close to 5000K to 6000K. That range gives a crisp white without leaning too blue. Anything higher tends to look purple-ish in rain and actually reduces contrast on wet asphalt. Avoid the 8000K stuff unless you care more about style than actually seeing the road.
Heat is the main killer of LED chips, so cooling matters a lot. But a noisy fan can get annoying and adds another moving part that might fail. Good quality bulbs use braided copper straps or passive heatsinks instead, or a small fan with a quiet bearing. If you go fanless, just make sure the bulb body isn't too long for your housing.
Independent bike shops often carry brands they've tested, which saves you the guesswork. For mail order, stick to dedicated motorcycle lighting retailers with detailed fitment charts and real customer photos. Avoid generic marketplace listings that reuse the same stock images and claim 20,000 lumens for $15.
You can do them separately, but expect a noticeable color mismatch if one is still halogen. If your bike uses separate bulbs for high and low, it's usually easier to replace both at the same time so the color temperature and beam behavior match. Otherwise you might get an odd two-tone look and one beam that feels dimmer than the other.
Conclusion
If you've ever ridden a twisty road after sunset with the stock halogen, you already know the panic of outrunning your own light. Swapping in an LED isn't about buying the biggest lumen number on the box—much of that marketing is inflated or measured in ways that don't translate to the road. Better to look for a clean beam pattern that matches your reflector or projector housing. A bulb that throws scattered glare might feel brighter, but it blinds oncoming traffic and can earn you a ticket. Check whether the bulb is road-legal in your region, and don't assume every "DOT approved" claim is genuine.
The real lifespan of an LED comes down to how well it sheds heat, not whether it has a tiny fan. Some passive heat-sink designs outlast cheap active fans that seize or whine. Also, "plug-and-play" is often a stretch—depending on your bike, you might hit polarity issues, CANbus errors, or simply not have enough clearance behind the headlight bucket for the bulb's base. When you're ready to buy, skip marketplace listings with suspicious reviews and go straight to established automotive lighting suppliers or brand stores that offer a clear warranty and reasonable return policy. A few extra dollars upfront beats melting a housing or getting stranded with a flickering bulb.
Contact Us
Contact Person: Gavin Chen
Email: [email protected]
Tel/WhatsApp: (+86)756-6831079
Website: https://www.luxfighter.com/